
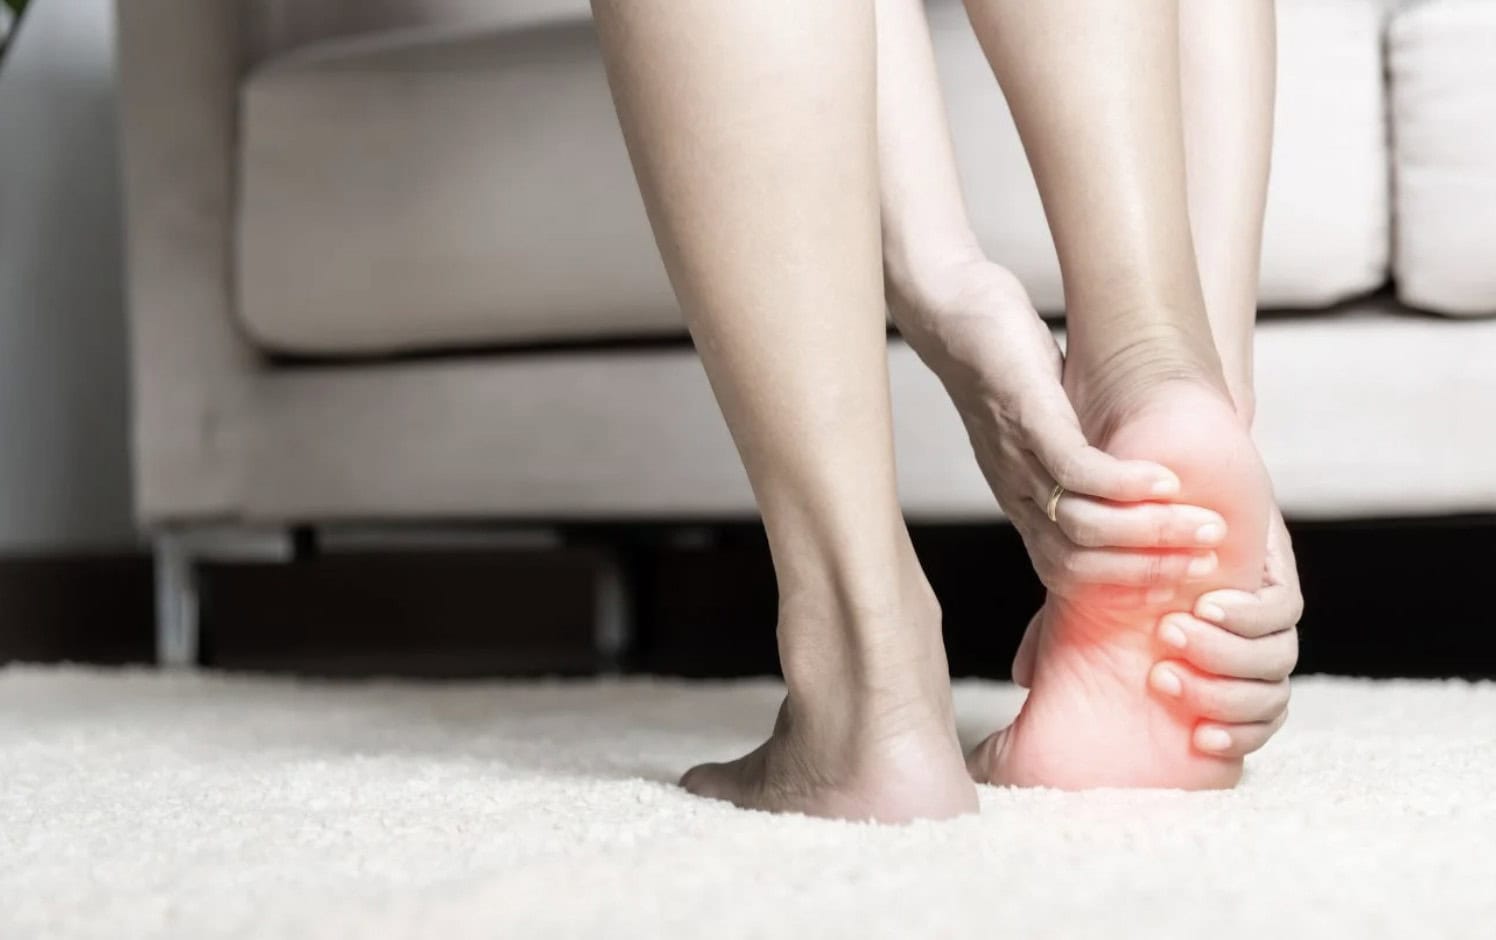
Achilles tendonitis is one of the most common — and most frustrating — injuries runners face. That thick band of tissue connecting your calf muscles to your heel bone absorbs forces of up to 6-8 times your body weight with every running stride, and when the load exceeds its capacity to recover, things start to break down.
The good news? Achilles tendonitis responds remarkably well to targeted exercise therapy. In fact, progressive loading through specific exercises is now considered the gold standard treatment — far more effective than rest alone. Research consistently shows that tendons need controlled stress to heal and remodel, not complete immobilization.
In this guide, we’ll walk you through 10 evidence-based exercises for Achilles tendonitis recovery, organized into a clear 3-phase progression. Whether you’re dealing with the sharp sting of a fresh flare-up or the nagging ache of a months-long issue, this framework will help you rebuild your Achilles tendon stronger than before and get back to running pain-free.
Understanding Achilles Tendonitis in Runners

The Achilles tendon is the largest and strongest tendon in the human body, connecting your gastrocnemius and soleus muscles (the two main calf muscles) to your calcaneus (heel bone). Despite its strength, it has a notoriously poor blood supply — especially in the area 2-6 cm above the heel insertion — which makes it vulnerable to overuse injuries and slow to heal.
Achilles tendonitis (more accurately called Achilles tendinopathy) develops when the tendon is repeatedly loaded beyond its capacity to recover. This isn’t necessarily about doing too much in a single run — it’s the cumulative effect of training load over time. Common triggers for runners include sudden increases in mileage or intensity, adding hill work or speed sessions too quickly, transitioning to lower-drop shoes, insufficient recovery between hard efforts, and weak or tight calf muscles.
The condition typically presents as a stiff, achy feeling in the tendon first thing in the morning or at the start of a run. In the early stages, it may warm up and feel better during activity, only to flare up afterward. Left unaddressed, it can progress to constant pain that limits not just running but everyday activities like walking up stairs.
Modern research has shifted the treatment paradigm away from anti-inflammatory approaches (since chronic tendinopathy isn’t primarily an inflammatory condition) toward progressive loading. The tendon needs to be gradually exposed to increasing mechanical stress to stimulate the cellular repair processes that strengthen and remodel its collagen fibers. That’s exactly what these exercises are designed to do.
The 3-Phase Recovery Framework
Effective Achilles tendonitis recovery follows a progressive approach. Jumping straight to heavy loading exercises when your tendon is acutely irritated will make things worse, while staying in the gentle phase too long will leave your tendon unprepared for the demands of running. The key is matching the exercise difficulty to your current pain level and gradually progressing.
Phase 1: Acute Pain Management (Weeks 1-2)
The goal of Phase 1 is to reduce pain and begin loading the tendon gently. You should be in this phase if your Achilles pain is above a 5/10 during daily activities, you have significant morning stiffness lasting more than 30 minutes, or the tendon is visibly swollen. Exercises in this phase use isometric (static hold) contractions and light, controlled movements that stimulate healing without further aggravating the tendon.
Phase 2: Strength Rebuilding (Weeks 3-8)
Phase 2 introduces progressive loading through isotonic (movement-based) exercises. You’re ready for this phase when your pain during daily activities is consistently below 4/10, morning stiffness resolves within 10-15 minutes, and you can walk without a limp. This phase includes the famous Alfredson eccentric protocol, which has decades of research supporting its effectiveness for Achilles tendinopathy.
Phase 3: Return to Running (Weeks 8-12+)
Phase 3 adds energy storage and plyometric exercises that mimic the demands of running. You should only enter this phase when you can complete all Phase 2 exercises pain-free, you can do 20 single-leg calf raises without pain, and you’ve been consistently completing Phase 2 work for at least 4-6 weeks. These exercises prepare the tendon for the high-velocity, spring-like loading it experiences during running.
Phase 1 Exercises: Acute Pain Management
Exercise 1: Isometric Calf Hold
Target muscles: Gastrocnemius, soleus
Phase: 1 (Acute Pain Management)
Sets × Reps: 5 × 45-second holds, 2 times per day

Isometric holds are the cornerstone of early-stage Achilles rehab. Research shows that isometric contractions can provide immediate analgesic (pain-relieving) effects on tendons while safely introducing load. This makes them the perfect starting point when your Achilles is too irritated for movement-based exercises.
How to perform:
- Stand on the edge of a step or stair with the balls of your feet on the step and your heels hanging off the edge.
- Rise up onto your toes (both feet) until you reach a full calf raise position.
- Transfer your weight to the affected leg and hold this position for 45 seconds.
- Use a wall or railing for balance. You should feel a strong contraction in your calf but the pain should stay below 3/10.
- Lower down on both feet, rest for 1 minute, and repeat.
Progression: If bodyweight holds become easy and pain-free, add resistance by holding a dumbbell or wearing a weighted backpack. Aim to gradually increase the hold time up to 60 seconds.
Exercise 2: Seated Heel Raise
Target muscles: Soleus (deep calf muscle)
Phase: 1 (Acute Pain Management)
Sets × Reps: 3 × 15 reps, once per day

The seated heel raise specifically targets the soleus muscle, which plays a crucial role in Achilles tendon health. Because the knee is bent during this exercise, the gastrocnemius is effectively shortened and can’t contribute much force, isolating the soleus. This is important because soleus weakness is often a hidden contributor to Achilles problems in runners.
How to perform:
- Sit on a chair or bench with your feet flat on the floor, knees bent at 90 degrees.
- Place a weight (dumbbell, kettlebell, or loaded backpack) on your thighs just above your knees.
- Slowly raise your heels off the ground as high as you can, pressing through the balls of your feet.
- Hold at the top for 2 seconds, then lower slowly over 3 seconds.
- Keep the movement controlled — no bouncing at the bottom.
Progression: Start with just bodyweight if needed, then gradually add load. You should be able to progress to a moderate weight within 1-2 weeks if pain allows.
Phase 2 Exercises: Strength Rebuilding
Exercise 3: Standing Calf Raise
Target muscles: Gastrocnemius, soleus
Phase: 2 (Strength Rebuilding)
Sets × Reps: 3 × 12-15 reps, once per day

The standing calf raise is the bridge between gentle Phase 1 exercises and the more demanding eccentric work that follows. It trains concentric (lifting) and eccentric (lowering) strength through a full range of motion, building the capacity your Achilles needs before you progress to single-leg and eccentric-focused exercises.
How to perform:
- Stand on the edge of a step with the balls of both feet on the step, heels hanging off.
- Hold a railing or wall for balance.
- Rise up onto your toes as high as you can over 2 seconds.
- Pause at the top for 1 second.
- Lower slowly over 3 seconds, dropping your heels just below the level of the step for a gentle stretch.
- Keep your knees straight throughout the movement.
Progression: Once you can complete 3 × 15 comfortably, add weight by holding a dumbbell in one hand. Aim to increase load by about 5% per week.
Exercise 4: Eccentric Heel Drop — Straight Knee (Alfredson Protocol)
Target muscles: Gastrocnemius (emphasis on eccentric loading)
Phase: 2 (Strength Rebuilding)
Sets × Reps: 3 × 15 reps, twice per day

The eccentric heel drop is the single most researched exercise for Achilles tendinopathy. Developed by Dr. Hakan Alfredson, this protocol involves slowly lowering the heel below the level of a step on the affected leg. The eccentric (lengthening) contraction stimulates collagen remodeling and tendon strengthening in ways that concentric exercises alone cannot achieve.
The original Alfredson protocol calls for 3 × 15 repetitions, twice daily, 7 days per week for 12 weeks. Mild discomfort during the exercise is acceptable and expected — you should only stop if the pain exceeds 5/10.
How to perform:
- Stand on the edge of a step on the ball of the affected foot, with your knee straight.
- Use your non-affected leg to push up to the top of a calf raise position.
- Lift your non-affected foot off the step so you’re standing on the affected leg only.
- Slowly lower your heel below the level of the step over 5 seconds, keeping your knee straight.
- Use both legs (or your non-affected leg) to return to the top position — do NOT push back up with the affected leg alone.
- Repeat for all reps.
Progression: Once you can complete the full protocol pain-free, add load progressively using a weighted backpack or holding dumbbells. Some athletes eventually work up to significant external loads.
Exercise 5: Eccentric Heel Drop — Bent Knee
Target muscles: Soleus (emphasis on eccentric loading)
Phase: 2 (Strength Rebuilding)
Sets × Reps: 3 × 15 reps, twice per day

This variation of the eccentric heel drop targets the soleus muscle by bending the knee approximately 20-30 degrees throughout the movement. Since the soleus is the primary calf muscle active during the stance phase of running (when the knee is slightly bent), this exercise is particularly important for runners. The Alfredson protocol recommends performing both the straight-knee and bent-knee versions daily.
How to perform:
- Stand on the edge of a step on the ball of the affected foot.
- Bend your knee about 20-30 degrees and maintain this bend throughout the entire movement.
- Use your non-affected leg to push up to the top position.
- Lift your non-affected foot off the step.
- Slowly lower your heel below the step over 5 seconds, keeping the knee bent.
- Return to the top using both legs. Repeat.
Progression: Same as the straight-knee version — add external load once bodyweight becomes comfortable. Perform alongside Exercise 4 for a complete eccentric program.
Exercise 6: Single-Leg Calf Raise
Target muscles: Gastrocnemius, soleus
Phase: 2 (Strength Rebuilding)
Sets × Reps: 3 × 10-12 reps per leg, once per day

The single-leg calf raise is a critical milestone exercise in your Achilles recovery. Since running is essentially a series of single-leg hops, your Achilles needs to be strong enough to handle your full body weight on one leg before you can safely return to running. Being able to perform 20 pain-free single-leg calf raises is a commonly used benchmark for return-to-running readiness.
How to perform:
- Stand on the edge of a step on the ball of one foot, with the other foot lifted behind you.
- Hold a railing for balance.
- Rise up as high as you can on your toes over 2 seconds.
- Pause at the top for 1 second.
- Lower slowly over 3 seconds until your heel drops just below the step level.
- Complete all reps on one side before switching.
Progression: Start with a range you can control. Gradually increase reps toward 20, then add external load. Compare side-to-side to identify strength deficits.
Exercise 7: Seated Soleus Raise With Weight
Target muscles: Soleus
Phase: 2 (Strength Rebuilding)
Sets × Reps: 4 × 8-10 reps (heavy), once per day

This is the heavy-loading progression of the seated heel raise from Phase 1. By this stage, you should be working with meaningful resistance to build true strength in the soleus. Research suggests that heavy slow resistance training (HSR) may be equally effective as the Alfredson eccentric protocol for many patients, and some clinicians now prefer a combined approach using both methods.
How to perform:
- Sit on a bench with the balls of your feet on a raised surface (a weight plate or low step works well) and your knees bent at 90 degrees.
- Place a heavy dumbbell or barbell across your thighs just above the knees.
- Raise your heels as high as possible over 3 seconds.
- Hold at the top for 2 seconds.
- Lower over 3 seconds back to the starting position.
- The last 2-3 reps of each set should feel genuinely challenging.
Progression: Increase weight by 5-10% when you can complete all sets and reps with good form. Aim to build up to a load that’s truly challenging for 8 reps.
Phase 3 Exercises: Return to Running
Exercise 8: Walking Lunges
Target muscles: Quadriceps, glutes, calves, Achilles tendon complex
Phase: 3 (Return to Running)
Sets × Reps: 3 × 12 per leg, twice per week

Walking lunges are a transitional exercise that bridges gym-based rehab and actual running mechanics. The lunge requires coordinated push-off through the calf and Achilles complex while moving forward, similar to the propulsive phase of running. It also challenges single-leg stability and strengthens the entire lower kinetic chain.
How to perform:
- Stand tall with feet hip-width apart.
- Take a large step forward with one foot and lower your back knee toward the ground.
- Keep your front knee tracking over your toes (not collapsing inward).
- Push off firmly through the ball of your front foot to stand and step forward with the opposite leg.
- Focus on a powerful push-off that engages the calf — this is the Achilles-specific component.
- Continue alternating legs as you walk forward.
Progression: Start with bodyweight, then add dumbbells. You can also increase speed gradually to introduce a more dynamic element.
Exercise 9: Single-Leg Hop Progression
Target muscles: Calf-Achilles complex, ankle stabilizers
Phase: 3 (Return to Running)
Sets × Reps: 3 × 10 hops per leg, twice per week
Hopping reintroduces the elastic energy storage and release that your Achilles tendon performs during running. This is a critical step because running requires your tendon to function as a spring — stretching under load and recoiling to propel you forward. Without plyometric preparation, your tendon may not be ready for the high-speed demands of running even if it’s strong enough for slow, controlled exercises.
How to perform:
- Stage A — Double-leg hops: Start by hopping in place on both feet. Keep the hops small (1-2 inches off the ground) and land softly through the balls of your feet. Do 3 × 20 before progressing.
- Stage B — Alternating single-leg hops: Hop from one foot to the other, like a slow, exaggerated running motion. Keep it controlled and low to the ground. Do 3 × 15 per side.
- Stage C — Single-leg hops: Hop continuously on the affected leg. Start with 5 hops and build up to 3 × 10. These should be pain-free.
Progression: Move through stages A → B → C over 2-3 weeks. Only progress when the current stage is pain-free during and the day after. Eventually, add forward and lateral hops.
Exercise 10: Plyometric Calf Bounce
Target muscles: Gastrocnemius, soleus, Achilles tendon (elastic recoil)
Phase: 3 (Return to Running)
Sets × Reps: 3 × 15 bounces, twice per week
The plyometric calf bounce is the final exercise before your return to running. It trains the rapid stretch-shortening cycle that your Achilles performs with every running stride — absorbing impact and immediately releasing that energy to propel you forward. This exercise closely mimics the loading rate and pattern of running, making it the ultimate test of your tendon’s readiness.
How to perform:
- Stand with feet hip-width apart.
- Rise onto your toes, then quickly bounce up and down using only your calf muscles and ankle joint.
- Keep your knees relatively straight — the movement should come from the ankles, not the knees.
- The bounces should be quick and rhythmic, spending minimal time on the ground (like jumping rope without the rope).
- Land on the balls of your feet and immediately spring back up.
Progression: Start with double-leg bounces. Progress to single-leg bounces once double-leg is pain-free. Increase speed gradually to simulate running cadence (170-180 contacts per minute).
Sample Weekly Schedules
Phase 1 Weekly Schedule (Weeks 1-2)
| Day | Exercise |
|---|---|
| Monday | Isometric Calf Hold 5 × 45s (AM + PM) + Seated Heel Raise 3 × 15 |
| Tuesday | Isometric Calf Hold 5 × 45s (AM + PM) |
| Wednesday | Isometric Calf Hold 5 × 45s (AM + PM) + Seated Heel Raise 3 × 15 |
| Thursday | Isometric Calf Hold 5 × 45s (AM + PM) |
| Friday | Isometric Calf Hold 5 × 45s (AM + PM) + Seated Heel Raise 3 × 15 |
| Saturday | Isometric Calf Hold 5 × 45s (AM + PM) |
| Sunday | Rest or gentle walking only |
Phase 2 Weekly Schedule (Weeks 3-8)
| Day | Exercise |
|---|---|
| Monday | Eccentric Heel Drops (straight + bent) 3 × 15 (AM + PM) + Standing Calf Raise 3 × 15 |
| Tuesday | Eccentric Heel Drops (straight + bent) 3 × 15 (AM + PM) + Seated Soleus Raise 4 × 8 |
| Wednesday | Eccentric Heel Drops (straight + bent) 3 × 15 (AM + PM) |
| Thursday | Eccentric Heel Drops (straight + bent) 3 × 15 (AM + PM) + Single-Leg Calf Raise 3 × 10 |
| Friday | Eccentric Heel Drops (straight + bent) 3 × 15 (AM + PM) + Seated Soleus Raise 4 × 8 |
| Saturday | Eccentric Heel Drops (straight + bent) 3 × 15 (AM + PM) + Standing Calf Raise 3 × 15 |
| Sunday | Eccentric Heel Drops (straight + bent) 3 × 15 (AM only) — light day |
Phase 3 Weekly Schedule (Weeks 8-12+)
| Day | Exercise |
|---|---|
| Monday | Single-Leg Calf Raise 3 × 15 + Walking Lunges 3 × 12 + Walk-Run Session |
| Tuesday | Eccentric Heel Drops 3 × 15 (maintenance) + Seated Soleus Raise 4 × 8 |
| Wednesday | Single-Leg Hop Progression 3 × 10 + Plyometric Calf Bounce 3 × 15 |
| Thursday | Rest or easy cross-training (cycling, swimming) |
| Friday | Single-Leg Calf Raise 3 × 15 + Walking Lunges 3 × 12 + Walk-Run Session |
| Saturday | Eccentric Heel Drops 3 × 15 (maintenance) + Plyometric Calf Bounce 3 × 15 |
| Sunday | Rest |
Running Modifications During Recovery
One of the biggest questions runners face with Achilles tendonitis is whether they can keep running during recovery. The answer depends on your pain level and how the tendon responds to load.
During Phase 1: Avoid running entirely. The tendon needs time to calm down, and the repetitive impact of running will likely aggravate it. Maintain fitness through cycling, swimming, pool running, or elliptical training instead. These activities load the calf-Achilles complex much less aggressively than running.
During Phase 2: You may be able to introduce short, easy runs if your pain is consistently below 3/10 during daily activities. Follow the “24-hour rule” — if your Achilles pain is worse the morning after a run compared to the morning before, you did too much. Reduce volume or take an extra rest day.
During Phase 3: Gradually rebuild your running volume using a walk-run protocol. Start with something like 1 minute running / 2 minutes walking for 20 minutes, performed on flat terrain at an easy pace. Increase the run intervals and decrease walk intervals over 4-6 weeks. Avoid hills, speed work, and long runs until you’ve been running consistently for at least 4 weeks without flare-ups.
General guidelines for running with Achilles tendonitis:
- Reduce your weekly mileage by at least 50% initially
- Run on flat, soft surfaces when possible (grass, trails, treadmill)
- Increase your cadence slightly to reduce load per stride
- Avoid running two days in a row during early return-to-running
- Continue your rehab exercises on non-running days
- Monitor the “morning after” test — your pain should not be increasing day over day
For a structured approach to returning to running after injury, check out our guide to running injury prevention, which includes detailed return-to-running protocols.
Red Flags: When to See a Doctor
While most cases of Achilles tendonitis can be managed with the exercise approach outlined above, some situations require professional evaluation. See a sports medicine doctor, orthopedist, or physiotherapist if you experience any of the following:
- Sudden sharp pain with a “pop” or “snap” sensation — this could indicate a partial or complete Achilles tendon rupture, which is a medical emergency
- Significant swelling or bruising around the ankle — may indicate a more serious structural issue
- Inability to point your toes or push off when walking — suggests possible tendon damage beyond tendinopathy
- Pain that worsens despite 4-6 weeks of consistent rehab exercises — you may need imaging (ultrasound or MRI) to assess the tendon structure
- Night pain that disrupts sleep — constant pain, especially at night, warrants investigation
- Pain or swelling in both Achilles tendons simultaneously — bilateral symptoms can sometimes be associated with systemic conditions or medication side effects (such as fluoroquinolone antibiotics)
- Numbness, tingling, or color changes in the foot — may indicate nerve or vascular involvement
If you’re unsure whether your Achilles issue is something you can manage on your own, err on the side of getting a professional assessment. A proper diagnosis early on can save you months of frustration.
Long-Term Prevention Tips
Once you’ve recovered from Achilles tendonitis, prevention becomes the priority. The unfortunate reality is that Achilles tendinopathy has a high recurrence rate — especially in runners who return to their previous training habits without addressing the underlying factors that caused the problem in the first place.
Here’s how to keep your Achilles tendons healthy for the long haul:
Maintain calf strength year-round. Continue performing calf raises (both seated and standing) at least 2-3 times per week as part of your regular strength training routine. Your Achilles tendon needs ongoing stimulus to maintain its capacity. Think of it as regular maintenance — like stretching or foam rolling, but far more effective for injury prevention.
Follow the 10% rule for mileage increases. Avoid increasing your weekly running volume by more than 10% from one week to the next. Sudden spikes in training load are one of the most common triggers for Achilles flare-ups. If you’re building toward a marathon, plan your mileage progression carefully.
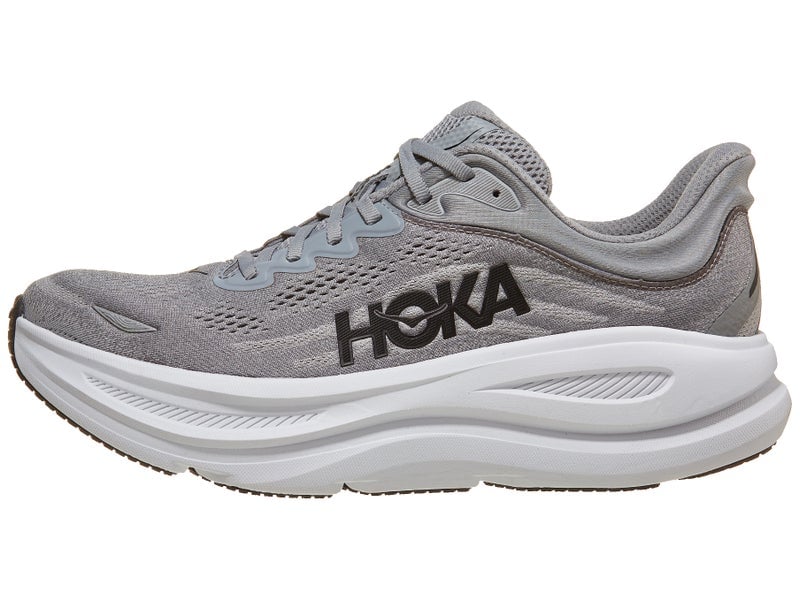
Wear appropriate running shoes. Shoes with an adequate heel-to-toe drop (8-12mm) reduce the load on the Achilles tendon compared to flat or minimalist shoes. If you’re prone to Achilles issues, be cautious about transitioning to low-drop shoes — and if you do, make the change very gradually over several months. Check out our guides to the best running shoes for beginners and best marathon running shoes for recommendations.
Warm up before running. A brief 5-10 minute walking warmup before running gives your tendons time to increase blood flow and become more pliable. Cold tendons are stiffer and more vulnerable to microtrauma. Dynamic calf raises and ankle circles are excellent pre-run tendon preparation.
Manage your training surface and terrain. Excessive hill running, particularly downhill running and steep uphill climbs, places very high loads on the Achilles tendon. If you feel any early warning signs of Achilles irritation, temporarily reduce hill work and stick to flat terrain.
Monitor for early warning signs. Morning stiffness in the tendon, a “creaky” feeling at the start of runs, or tenderness when you squeeze the tendon between your fingers are all early indicators that the tendon is becoming overloaded. Catching these signs early and adjusting your training accordingly can prevent a full-blown flare-up.
Frequently Asked Questions
How long does Achilles tendonitis take to heal?
Most runners see significant improvement within 6-12 weeks of consistent rehab exercises, though complete recovery can take 3-6 months depending on the severity. Chronic cases that have been present for many months may take longer. The key factor is consistency with the exercise program — sporadic effort produces sporadic results. Even after pain resolves, continue your strengthening program for at least 4-6 additional weeks to build a buffer of tendon capacity.
Can I run with Achilles tendonitis?
It depends on the severity. If your pain is mild (below 3/10) and doesn’t worsen after running, you can likely continue running at reduced volume. However, if your pain is moderate to severe (above 4-5/10), running will likely delay healing and should be avoided until you’ve progressed through Phase 1 exercises. Use the “24-hour rule” as your guide: if your symptoms are worse the morning after a run compared to the morning before, you did too much and need to scale back.
Should I stretch my Achilles if it hurts?
Aggressive static stretching of an irritated Achilles tendon can actually make things worse by compressing the tendon against the heel bone. During the acute phase, avoid deep calf stretches. Instead, focus on the isometric and gentle loading exercises described in Phase 1. As your pain improves in Phase 2, you can gradually introduce gentle calf stretches, but the priority should always be on strengthening rather than stretching. The tendon needs to become stronger, not just more flexible.
What shoes are best for Achilles tendonitis?
Look for running shoes with a moderate heel-to-toe drop (8-12mm), which reduces strain on the Achilles by placing the calf-tendon complex in a slightly shortened position. Shoes with good cushioning also help by absorbing impact forces. Avoid minimalist shoes, racing flats, and zero-drop shoes during recovery, as they place greater demand on the Achilles. A temporary heel lift insert (5-10mm) inside your regular shoes can also provide relief during the acute phase. See our best running shoes for beginners guide for well-cushioned options.
Is heat or ice better for Achilles tendonitis?
In the acute phase (first 1-2 weeks), ice can help manage pain and any swelling — apply for 15-20 minutes after exercise or at the end of the day. After the acute phase, heat is generally more beneficial as it increases blood flow to the tendon and can help reduce stiffness, especially before exercises. Many runners find that applying heat before their rehab exercises and ice afterward works well. However, neither heat nor ice is a substitute for the progressive loading exercises — they’re supplementary comfort measures, not treatments.
When should I see a doctor?
See a doctor immediately if you experience a sudden “pop” or snap in the tendon (possible rupture), can’t walk or push off with the affected foot, or have severe swelling and bruising. You should also seek professional help if your symptoms haven’t improved after 4-6 weeks of consistent exercise therapy, pain is worsening over time despite appropriate management, you have bilateral Achilles pain (both sides), or you’re experiencing night pain that disrupts sleep. A sports medicine doctor or physiotherapist can provide imaging, rule out other conditions, and guide your rehabilitation.
The Bottom Line
Achilles tendonitis doesn’t have to end your running career. With a structured, progressive exercise program and the patience to let your tendon adapt, most runners make a full recovery and return to their previous — or even higher — levels of performance.
The key takeaways from this guide: start with gentle isometric loading in Phase 1 to manage pain, progress to the Alfredson eccentric protocol and heavy slow resistance training in Phase 2 to rebuild strength, and prepare for running with plyometric exercises in Phase 3. Be consistent, respect the timeline, and use pain as your guide — not a reason to stop, but a signal to adjust.
For more on keeping your running journey injury-free, explore our guides to running injury prevention, calf pain from running, and plantar fasciitis in runners.
RunClub — Free
Join 300,000+ runners in RunClub
Free training plans for every distance, a daily running game, exclusive coaching content, and a real community of runners. Create your free account in 20 seconds — no card.
Already a member? Log in →


Start the conversation