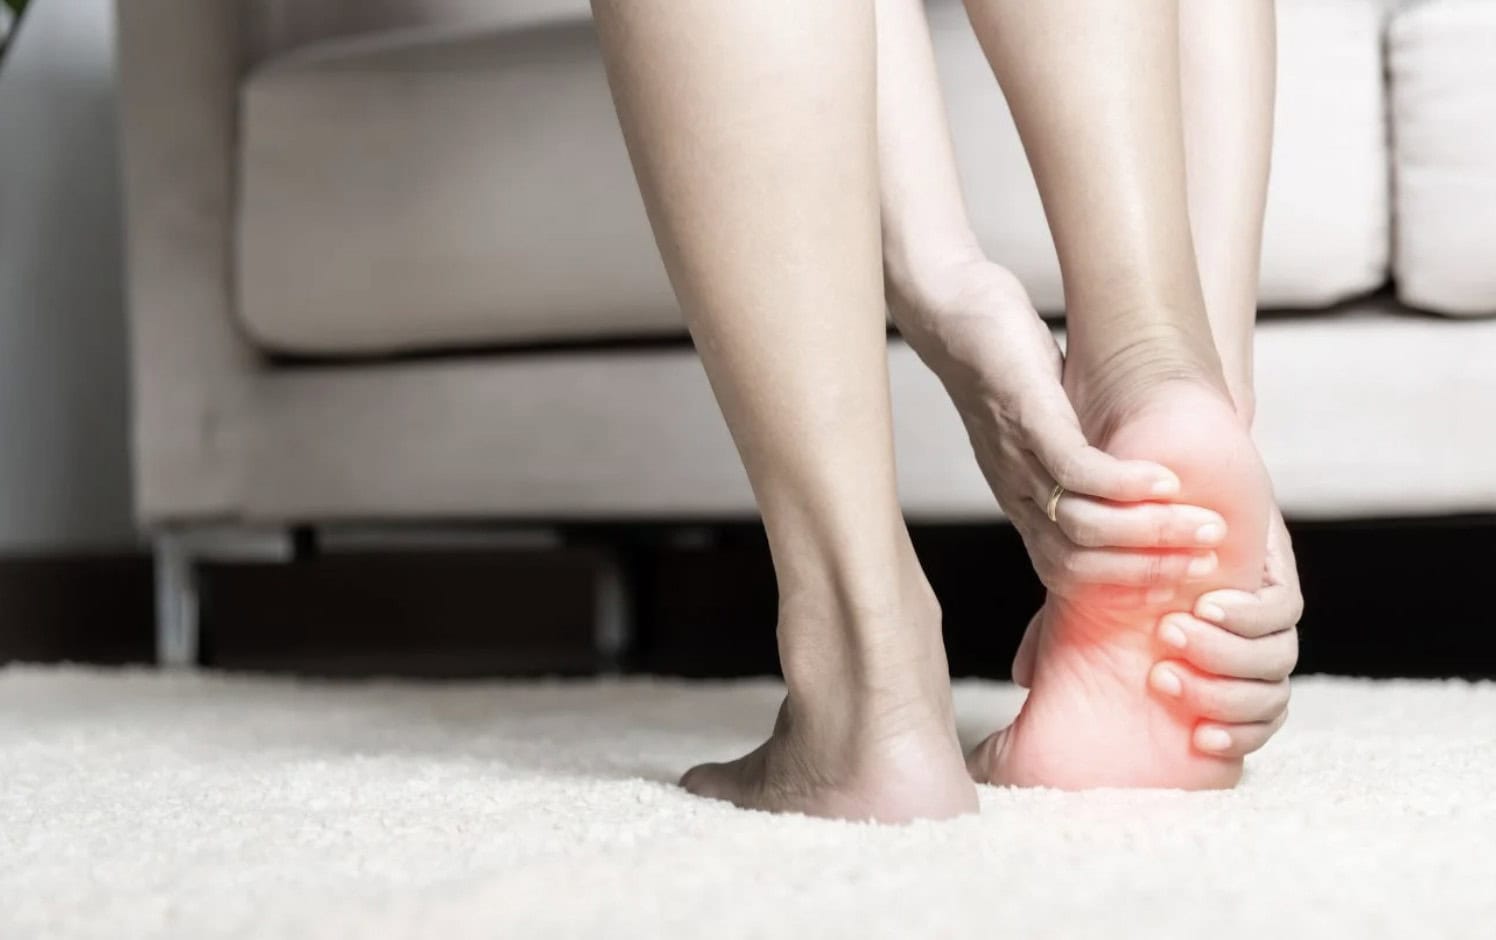
Runner’s kneeâmedically known as patellofemoral pain syndrome (PFPS)âaffects roughly 25-30% of all runners at some point in their running career. If you’ve experienced that dull, aching pain behind or around your kneecap during or after a run, you know how frustrating it can be. The worst part? It often seems to strike out of nowhere, forcing you to cut back on training or stop running altogether. But here’s the good news: in most cases, runner’s knee responds exceptionally well to targeted exercises and doesn’t require surgery or prolonged rest.
The key to fixing runner’s knee is understanding that the problem rarely originates at the knee itself. Instead, weakness in your hips, glutes, and quadricepsâcombined with poor muscle balanceâcauses your kneecap to track incorrectly through its groove on the femur. When the kneecap doesn’t track properly, it irritates the cartilage underneath, creating that characteristic pain that worsens when going downstairs, squatting, sitting for long periods, or pushing your weekly mileage. The good news? This guide provides a proven three-phase exercise approach that addresses the root causes of runner’s knee and gets you back to pain-free running.

Understanding Runner’s Knee
Your kneecap (patella) sits in a groove called the trochlear groove on your thighbone (femur). This groove is designed to keep the kneecap centered and balanced as your knee bends and straightens. However, when certain muscles become weak or tightâparticularly your hip abductors, glutes, and vastus medialis obliquus (VMO, the inner quad)âyour kneecap loses this ideal tracking. Instead of moving straight, it gets pulled outward or inward, causing it to rub against the cartilage lining the joint. This is what creates that nagging pain and inflammation associated with runner’s knee.
Several factors contribute to poor kneecap tracking in runners. Hip weakness is the primary culpritâyour glutes should stabilize your pelvis during each step, but when they’re underactive, your pelvis tilts and your knee caves inward (called valgus collapse). Tight hip flexors tilt your pelvis forward, changing how forces transfer through your knee. An imbalance between your quadriceps and hamstrings puts extra stress on the kneecap. Additionally, rapid increases in training volume or mileage, worn-out running shoes that have lost their cushioning, running on cambered or sloped surfaces, and poor running form all contribute to the problem. The good news is that targeting these underlying weaknesses with the right exercises can resolve runner’s knee in 4-12 weeks for most people.
Phase 1: Pain Management & Activation (Weeks 1-2)
The first phase of your recovery focuses on reducing pain and activating the muscles that have become dormant or inhibited due to your knee pain. During this phase, you’ll avoid high-impact loading and instead perform gentle, controlled exercises that strengthen key muscles without aggravating your knee. This foundation is criticalârushing through this phase leads to setbacks later. Perform these exercises daily and apply ice after your workout if you experience any swelling.
Exercise 1: Straight Leg Raise
The straight leg raise is one of the safest ways to activate your quadriceps without loading your knee joint. Lie on your back with one knee bent (foot flat on the floor) and your other leg straight. Tighten the quad of your straight leg by pushing the back of your knee down into the floor. Once you feel that contraction, lift your straight leg about 6-8 inches off the ground. Hold this position for 3 seconds, then lower slowly without letting your heel touch the floor. That’s one rep. The key is maintaining that quad contraction throughoutâyou should feel your inner thigh working more than your outer thigh.
Sets and Reps: 3 sets of 15 reps on each leg. Why it helps: This exercise strengthens your quadriceps without the compressive forces that come with loaded movements like squats. A stronger quad directly improves kneecap tracking.
Exercise 2: Quad Set (Isometric)
Quad sets are an isometric exercise that specifically targets your vastus medialis obliquus (VMO)âthe inner part of your quadriceps that’s often underactive in people with runner’s knee. Sit with your legs extended and place a rolled towel under one knee. Press the back of that knee down into the towel, creating a strong contraction in your quad. You should see your kneecap move upward slightly. Hold this contraction as hard as you can while keeping tension through your entire quadriceps.
Sets and Reps: 3 sets of 10 reps with 10-second holds on each leg. Why it helps: Quad sets activate and strengthen the VMO, which is crucial for proper kneecap alignment. This exercise is particularly effective because it’s pain-free for nearly all runners with PFPS.
Exercise 3: Wall Sit Hold
->Wall sits build isometric quad strength and endurance. Stand with your back against a wall and slide down until your knees are bent at roughly 45 degreesânot 90 degrees, which is too deep and puts excessive stress on your patellofemoral joint during early rehab. Your knees should be directly over your ankles, and your chest should stay against the wall. Hold this position while maintaining constant tension in your quads. Your legs will burn, but your knees shouldn’t hurtâif they do, come up a few inches until you find a pain-free range.
Sets and Reps: 3 sets of 30-45 second holds. Progression: As your pain decreases and strength improves, progress to single-leg wall sits by shifting your weight onto one leg. Why it helps: Wall sits train your quads to work continuously under load, building the endurance needed for pain-free running.
Exercise 4: Side-Lying Hip Abduction
Lie on your side with both legs straight, your head resting on your lower arm. Engage your glutes and lift your top leg to about 45 degrees (don’t overextendâyour hip should stay in a neutral position). Lower the leg slowly back down without letting it touch your bottom leg. This is one rep. The movement should be controlled and deliberate, with your glute doing the work rather than swinging momentum.
Sets and Reps: 3 sets of 15 reps on each side. Why it helps: Hip weakness is a primary contributor to runner’s knee. Your hip abductors (particularly the gluteus medius) stabilize your pelvis during running. When they’re weak, your pelvis drops on the opposite side with each step, causing your knee to cave inward. Strengthening these muscles corrects this pattern.
Phase 2: Strengthening (Weeks 3-6)
Once your pain has decreased and you’ve established a baseline of quad and glute activation from Phase 1, you’re ready to progress to loaded strengthening exercises. These movements build real strength in the muscles that support your knee and prepare your body for the return to running. Perform these exercises 3-4 times per week, allowing at least one rest day between sessions. If you’re pain-free, you can now introduce easy running on your non-strength days, but keep the intensity low and the volume moderate.
Exercise 5: Step-Up with Knee Drive

Step-ups are one of the most effective exercises for building single-leg strength and power. Stand in front of a step or bench that’s 6-8 inches high. Step up with one leg, driving the opposite knee upward toward your chest as you stand. Pause at the top for a second, then control your descent by lowering your stepping leg back down in a slow, controlled manner. The lowering (eccentric) phase is particularly important for building strength and resilience in your knees. Step up with the same leg for all reps, then switch legs and repeat.
Sets and Reps: 3 sets of 10 reps on each leg. Progression: As strength improves, add dumbbells or increase step height to 12 inches. Why it helps: Step-ups strengthen the quadriceps and glutes while training single-leg stabilityâa movement pattern directly relevant to running.
Exercise 6: Bulgarian Split Squat

This is an advanced single-leg squat variation that builds tremendous strength and stability. Place one foot on a bench or couch behind you, about 2 feet back. Your front leg should be far enough forward that when you lower into a lunge, your front thigh ends up parallel to the ground and your knee is over your ankle (not past your toes). Lower yourself by bending your front knee, stopping when your front thigh reaches parallel. Push through your front foot to stand back up. Keep your chest upright and your front knee tracking over your second toeâavoid letting it cave inward.
Sets and Reps: 3 sets of 8-10 reps on each leg. Progression: Begin with bodyweight, then hold dumbbells at your sides. Why it helps: Bulgarian split squats build single-leg strength with a range of motion that’s slightly less demanding than a full pistol squat, making them ideal for runner’s knee rehabilitation. They particularly strengthen the VMO and stabilizer muscles.
Exercise 7: Single-Leg Romanian Deadlift
Stand on one leg with a slight bend in that knee. This is your stance leg. Keeping your torso relatively upright, hinge at your hips and lower your torso toward the ground while simultaneously extending your free leg behind you for balance. Your torso and free leg should form roughly a straight line at the bottom. Return to standing by contracting your glutes and hamstrings. The key is moving through your hip, not your kneeâyour stance knee should maintain the same slight bend throughout the movement.
Sets and Reps: 3 sets of 10 reps on each leg. Progression: Hold dumbbells in both hands or one hand for added resistance. Why it helps: This exercise strengthens your posterior chain (glutes and hamstrings) while training single-leg balance. It’s particularly effective because it teaches your body to hinge at the hips rather than the knees, reducing stress on your patellofemoral joint.
Exercise 8: Lateral Band Walk
Place a resistance band around your legs just above your knees. Stand in a quarter-squat position (knees bent about 20-30 degrees, as if sitting back into a chair). Maintain this position throughout the exercise. Step sideways, leading with one foot, while keeping tension on the band. Your knees should stay aligned with your toesâdon’t let them cave inward. Continue stepping in one direction for the prescribed reps, then reverse and walk back the other direction.
Sets and Reps: 3 sets of 15 steps in each direction. Why it helps: Lateral band walks target the gluteus medius, which is critical for pelvic stability during running. A strong gluteus medius prevents the Trendelenburg pattern (pelvis dropping on one side) that causes knee valgus and runner’s knee.
Exercise 9: Glute Bridge March
Lie on your back with your knees bent and feet flat on the floor, positioned so your heels are about 12 inches from your glutes. Push through your feet to lift your hips off the ground, creating a straight line from your knees through your hips to your shoulders. Squeeze your glutes at the top. From this bridge position, lift one foot off the ground and straighten that leg slightly, as if marching. Lower that foot back down and repeat with the opposite leg. The key is maintaining your bridge positionâyour hips should stay elevated and level throughout the movement.
Sets and Reps: 3 sets of 20 marches (10 per leg). Why it helps: This exercise teaches your glutes to activate and remain engaged during dynamic movement, simulating what your glutes need to do during running.
Exercise 10: Reverse Lunge


Stand upright with your feet hip-width apart. Step backward with one leg, lowering your body until your back knee nearly touches the ground and your front thigh is parallel to the ground. Push through your front foot to return to standing. Unlike forward lunges, reverse lunges are easier on your knees because they reduce the shearing forces through the patellofemoral joint. Keep your torso upright and your front knee tracking over your second toe.
Sets and Reps: 3 sets of 10 reps on each leg. Progression: Add dumbbells or increase range of motion as strength improves. Why it helps: Reverse lunges build single-leg strength in both the quads and glutes while being gentler on the knee joint than forward lunges.
Phase 3: Return to Running (Weeks 6-8+)
During the final phase, you’ll introduce sport-specific movements that challenge your strength and stability in ways that more closely resemble running. These exercises build resilience and prepare your body to handle the impact and demands of full training. You can now perform these exercises 2-3 times per week while gradually increasing your running volume. The key is listening to your bodyâprogress your running volume by no more than 10% per week, and if your knee pain returns, back off and repeat the previous phase for another week or two.
Exercise 11: Walking Lunge with Rotation

This exercise adds a dynamic, rotational component to your lunge. Step forward into a lunge position with one leg. As you lower into the lunge, rotate your torso toward your front leg, bringing your opposite elbow toward your front knee. This rotation mimics the natural twisting motion of your torso during running. Push back to standing and step forward with the opposite leg, repeating the rotation on that side. Continue alternating legs for the prescribed reps.
Sets and Reps: 3 sets of 10 reps on each leg. Why it helps: Walking lunges with rotation train your legs and core to work together dynamically, strengthening the stabilizer muscles that keep your pelvis aligned during running and helping to prevent rotation-related knee stress.
Exercise 12: Single-Leg Box Squat
This is the gold standard test of single-leg strength and control. Stand on one leg in front of a bench or box that’s roughly at knee height. Keeping your chest upright and your free leg extended in front of you for balance, lower yourself by bending your stance leg until you lightly touch the bench with your glutes. Your knee should stay over your ankle and not cave inward. The key here is controlâdon’t drop quickly or use momentum to stand back up. Push through your foot to stand up using only your stance leg strength. This should feel difficult, but your knee shouldn’t hurt.
Sets and Reps: 3 sets of 8 reps on each leg. Why it helps: Single-leg box squats build the kind of single-leg strength and stability that directly translates to running performance and knee resilience. Successfully performing this exercise indicates that your knee is ready to handle the demands of distance running.
3 Essential Stretches for Runner’s Knee
While strengthening exercises are the primary tool for fixing runner’s knee, flexibility work is equally important. Tight muscles pull on your knee and affect your alignment, so dedicating 5-10 minutes daily to these stretches will speed your recovery and prevent future problems.
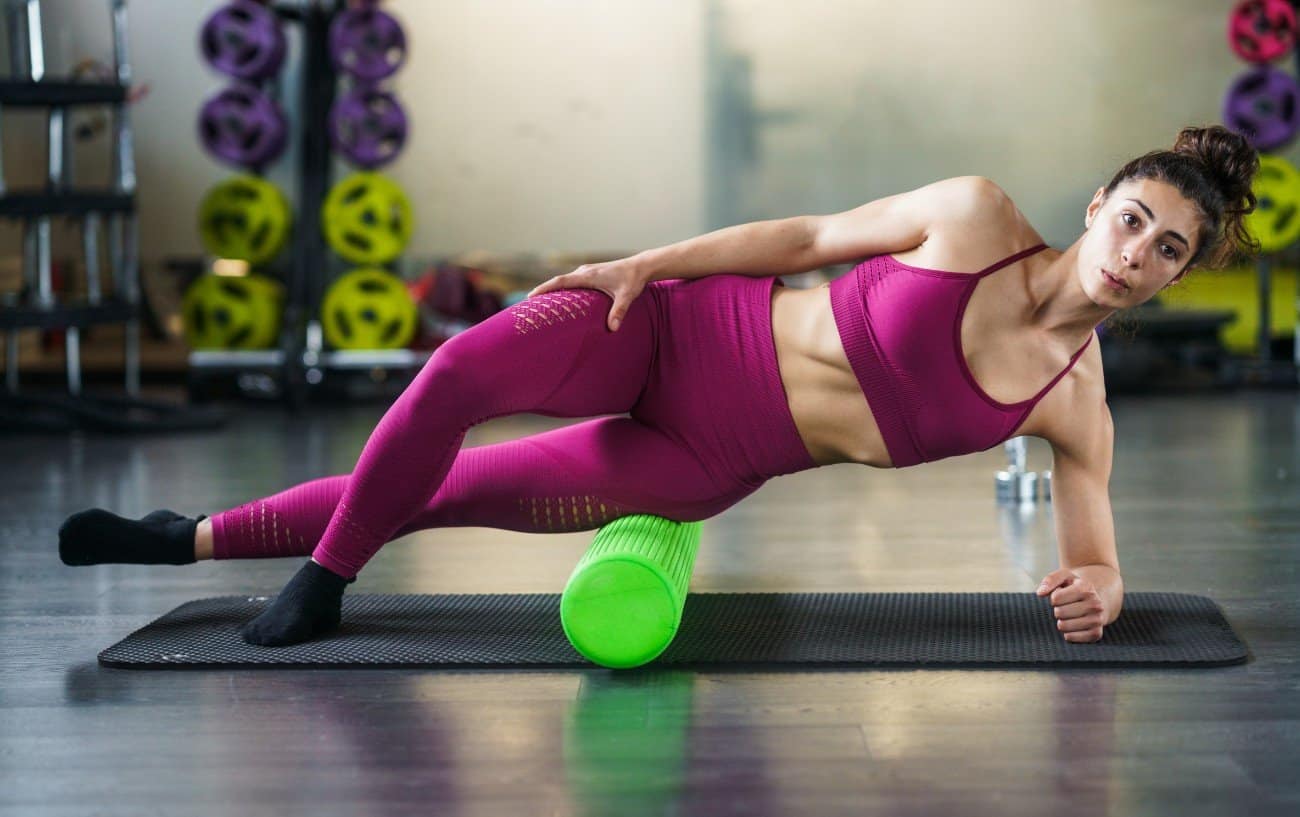
IT Band Foam Rolling

Technically a self-myofascial release technique rather than a traditional stretch, foam rolling breaks up adhesions and tight bands in your IT band and lateral thigh. Sit on the ground with a foam roller under your lateral (outer) thigh. Support yourself with your hands and roll your thigh from your hip down to just above your knee. Spend 30-60 seconds on each side, pausing on especially tender spots for 10-15 seconds. This may feel uncomfortable, but it’s an effective way to address the lateral knee tightness that contributes to runner’s knee.
Standing Quad Stretch
Stand on one leg and pull your other heel toward your glute, keeping your knees together and your torso upright. You should feel a stretch down the front of your thigh. Hold this position for 30-45 seconds, breathing deeply. Release and repeat on the other side. Perform 2-3 reps on each side daily. Tight quads pull on your kneecap and contribute to poor tracking, so maintaining quad flexibility is important for long-term knee health.
Half-Kneeling Hip Flexor Stretch
Kneel on one knee on a padded surface (like a yoga mat or cushion), with your other leg stepped forward in a lunge position. Push your hips forward until you feel a stretch in the front of your back leg’s hip. Simultaneously, squeeze the glute of your back leg. This combinationâstretching the hip flexor while activating the gluteâhelps correct the anterior pelvic tilt that contributes to runner’s knee. Hold for 30-45 seconds and perform 2-3 reps on each side daily. Tight hip flexors pull your pelvis forward, changing the angle at which forces pass through your knee.
Common Mistakes That Slow Recovery

1. Rest-Only Approach: Many runners assume that simply resting from running will fix knee pain. In reality, resting alone doesn’t address the underlying muscle imbalances that caused the problem. When you return to running without doing strengthening work, the same imbalances exist, and pain returns quickly. Targeted exercise is the true solution.
2. Ignoring Hip Weakness: Some runners focus exclusively on knee exercises while ignoring hip and glute work. This is a critical mistake because hip weakness is the primary driver of runner’s knee. If you strengthen your quad but leave your glutes weak, you haven’t fixed the problemâyou’ve just temporarily masked it.
3. Running Through Significant Pain: There’s a difference between mild discomfort and significant pain. Mild pain (1-3 out of 10) during or after running may be tolerable while you rehabilitate. Significant pain (5+) is your body’s signal that something is wrong. Continuing to run with high-level pain delays healing and can lead to compensation injuries in other areas like your other knee, hip, or ankle.
4. Jumping Phases Too Quickly: The three-phase approach is structured for a reason. Jumping directly to Phase 3 exercises before establishing a base of strength and confidence often results in setbacks and renewed pain. Trust the process and spend the full 2-3 weeks in each phase before progressing.
5. Skipping Eccentric Work: Many people rush through the lowering phase of exercises, doing the concentric (lifting) part explosively and then dropping back down. The lowering phase is actually the most important for building strength and resilience in tendons and muscles. Slow, controlled lowering over 2-3 seconds is crucial for real adaptation.
6. Neglecting Single-Leg Work: Running is fundamentally a single-leg activityâyou’re supporting your body weight on one leg at a time. Bilateral exercises like regular squats and lunges are helpful but insufficient. Single-leg exercises like single-leg box squats and step-ups are critical for building the stability and strength that directly transfers to running.
How to Modify Your Running During Recovery
If you have mild pain that allows you to run, these modifications will reduce stress on your knee during the healing process. Reduce your weekly mileage by 30-50%âif you normally run 30 miles per week, drop to 15-20 miles during early recovery. Increase your running cadence by 5-10%âaim for 175-180 steps per minute instead of 165-170. Research shows that increasing cadence reduces peak forces through the patellofemoral joint by up to 20%, making this one of the easiest modifications you can make. Avoid hills, stairs, and downhill running for at least the first 4 weeks, as these dramatically increase forces through your knee. Follow the 24-hour rule: if your knee pain increases during a run and that pain lasts more than 24 hours afterward, you did too much. Back off and repeat the previous week’s mileage. Run on flat, even surfaces when possible, avoiding cambered roads and uneven terrain. Consider incorporating walk-run intervals, even if you normally run continuously. A 4 minutes running / 1 minute walking pattern can dramatically reduce knee stress while maintaining your aerobic fitness.
Red Flags: When to See a Doctor
Runner’s knee usually responds well to conservative treatment, but certain symptoms warrant medical evaluation. See a doctor if you experience:
- Sharp, sudden pain (versus gradual onset knee pain)
- Knee locking or giving way during activity
- Significant swelling that develops within a few hours of activity
- Inability to bear weight on the injured leg
- Pain at rest that doesn’t improve with ice and elevation
- Symptoms that worsen despite 4+ weeks of consistent exercise and activity modification
- Numbness or tingling around the knee or down your leg
These symptoms may indicate a different injury (meniscal tear, ligament damage, etc.) that requires imaging and professional treatment.
Sample Weekly Schedule
Phase 1 (Weeks 1-2): Perform the four activation exercises daily. Apply ice to your knee after your workout if you experience swelling. Do not runâfocus entirely on pain reduction and muscle activation. Many runners find that performing these exercises right before bed helps reduce pain-related sleep disruption.
Phase 2 (Weeks 3-6): Perform the strengthening exercises (Exercises 5-10) 3-4 times per week with at least one rest day between sessions. If pain-free, you can incorporate easy-paced running 2-3 times per week, keeping runs to 20-30 minutes at a conversational pace. Do not do speed work or long runs during this phase. Continue daily stretching and foam rolling.
Phase 3 (Weeks 6-8+): Perform the advanced exercises (Exercises 11-12) 2-3 times per week as maintenance. Gradually increase running volume by 10% per week. You can now incorporate tempo runs, long runs, and speed work as long as your knee remains pain-free. Continue doing at least one lower-body strength session per week indefinitely to prevent recurrence.
Frequently Asked Questions
How Long Does Runner’s Knee Take to Heal?
For most runners, runner’s knee responds to conservative treatment within 4-12 weeks. The timeline depends on the severity of your pain, how consistently you perform the exercises, and how quickly you address the underlying strength deficits. Some runners see improvement within 2-3 weeks, while others take 8-12 weeks to resolve pain completely. The key variable is consistencyâperforming your exercises 4-5 times per week yields much faster results than sporadic effort.
Can I Run with Runner’s Knee?
Mild pain (1-3 out of 10) during and immediately after running is generally acceptable if it doesn’t worsen in the 24 hours following your run. Pain above 3 out of 10 should be a signal to stop and reduce your running volume. The general rule is: if pain during a run causes you to alter your gait or running form, you’re doing too much and should back off. Pain that increases in the days following a run is also a sign that you’ve exceeded your current capacity.
Should I Wear a Knee Brace?
Patellar straps (bands that go around the kneecap) can provide short-term comfort and reduce pain during running by helping to stabilize the kneecap. However, a knee brace is a temporary solution, not a cure. Wearing a brace without doing strengthening exercises is like putting a band-aid on a broken bone. The real solution is building the strength and muscular stability that makes a brace unnecessary. Use a brace for short-term pain management if it helps you stay active, but focus your energy on the exercises that actually fix the problem.
Are Squats Good or Bad for Runner’s Knee?
Squats are good for runner’s knee when performed correctly, but bad when done with poor form or excessive range of motion too early in rehabilitation. During Phases 1-2, avoid deep squats that load your knee at the end of its range. Partial-range squats (45-90 degrees of knee bend) with proper form are excellent. The key is maintaining proper alignmentâkeeping your knees tracking over your toes, not caving inward, and avoiding compensation in your lower back. Bulgarian split squats and box squats are particularly good because they allow you to control your range of motion and work one leg at a time.
Why Does My Knee Hurt Going Downstairs?
Descending stairs puts 3-4 times your body weight through your patellofemoral jointâfar more stress than level running or going upstairs. This high loading on the knee’s highest-stress moment is exactly why stair descent is often the most painful activity for people with runner’s knee. The good news is that as your quad strength improves (particularly your VMO), your ability to control the descent improves and this pain resolves. In the short term, avoid stairs and use ramps when possible. As you progress through the strength phases, you’ll notice that stairs become increasingly tolerable.
How Do I Prevent Runner’s Knee From Coming Back?
Once you’ve recovered from runner’s knee, the best prevention strategy is maintaining the strength you’ve built. Perform at least one lower-body strength session per week indefinitelyâeven 30 minutes of maintenance work (squats, lunges, single-leg exercises, and hip work) twice per week can prevent recurrence. Additionally, follow smart running practices: increase weekly mileage by no more than 10% each week, replace your running shoes every 300-500 miles, warm up properly before runs with dynamic stretches, and maintain flexibility with the stretches provided in this guide. Pay attention to warning signs (early-stage knee pain) and address them immediately with a few days of modified training and preventive exercises rather than ignoring them until they become serious problems.
Related Resources
Runner’s knee isn’t the only lower-body injury that affects distance runners. If you’re dealing with other running-related issues, these resources can help. Learn more about IT band syndrome, which often occurs alongside runner’s knee, or explore a broader overview of knee pain from running to understand different knee injury types. Investing in proper footwear can also play a role in prevention and recoveryâcheck out our guides to best running shoes for beginners, best daily running shoes, and best marathon running shoes. Other common overuse injuries that respond well to targeted exercise include Achilles tendonitis exercises. Remember that while this guide provides comprehensive rehabilitation strategies, consistency with your exercise program and listening to your body are the true keys to recovery.
RunClub — Free
Join 300,000+ runners in RunClub
Free training plans for every distance, a daily running game, exclusive coaching content, and a real community of runners. Create your free account in 20 seconds — no card.
Already a member? Log in →


Start the conversation